
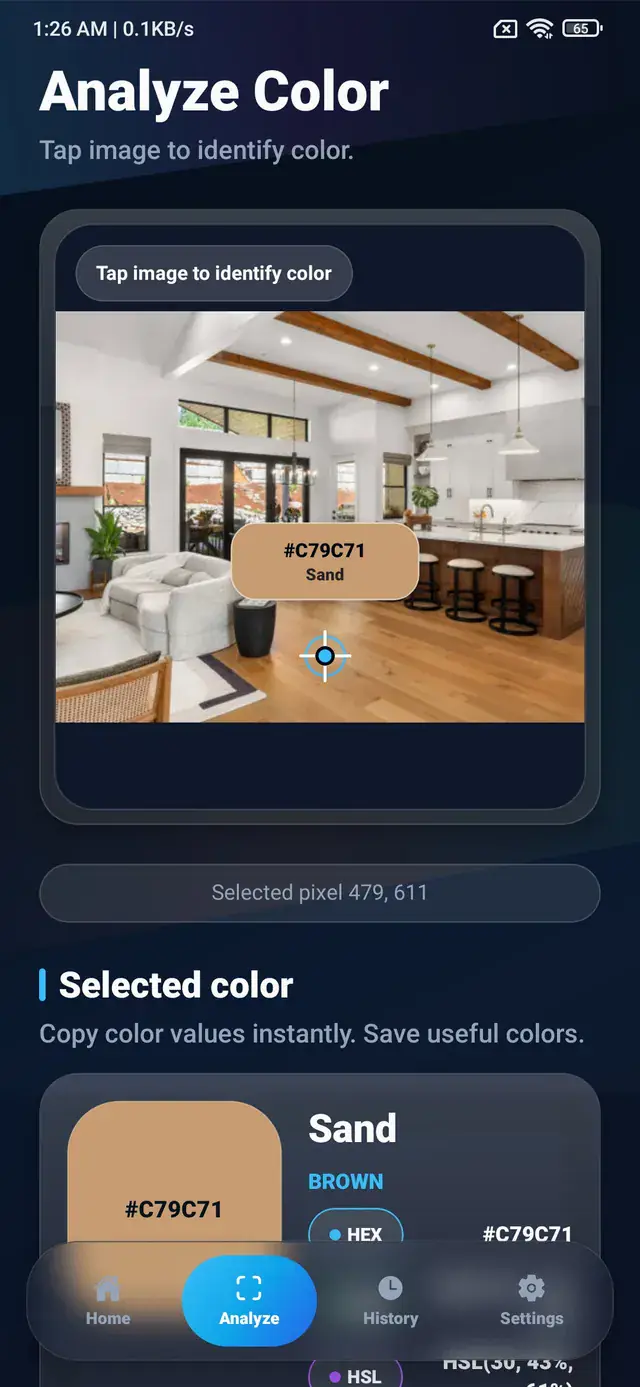
Quick answer: To identify a color from a photo on Android, open the image in a photo color picker, zoom into the area you want to inspect, and tap a clear pixel. The result can then be shown as a color name and as HEX, RGB, HSL, or CMYK values.
What does identifying a color from a photo mean?
A digital photo is a grid of pixels, and every pixel stores color information. A color identifier reads the pixel at the point you select and translates that information into useful formats. Instead of describing a shade as “a medium blue,” you can record it as #2563EB or RGB(37, 99, 235).
This is useful when a color appears in a screenshot, product photo, room image, poster, landscape, or piece of artwork. The value gives you a practical reference for a design system, illustration, presentation, website, or creative project.
Photo identification measures the color captured in the image. It does not directly measure the physical surface that was photographed. Lighting and camera processing can change the stored pixel, so it helps to understand both the tool and the source image.
Before you select a color
Start with the clearest version of the photo. A larger image gives you more pixels to target, while a compressed image may blend edges and create small blocks of similar color.
For a useful result:
- choose an image without strong filters;
- avoid deep shadows and bright reflections;
- use a flat area rather than the boundary between objects;
- check whether the image has warm or cool lighting;
- compare several nearby points before saving a value.
If you are photographing an object, use soft, neutral light. A white wall photographed under an orange lamp will produce warm beige pixels, even though the wall appears white in daylight.
Step 1: Open a gallery image or camera photo
The first decision is whether to use an existing image or capture a new one. A gallery photo works well for screenshots, saved inspiration, downloaded images, and previous camera shots. A camera image is useful when the object or scene is in front of you.
ColorSnap supports both workflows through its Android color identifier. Select the source that gives you the clearest view of the color. When accuracy matters, take more than one photo under slightly different lighting and compare the results.
Step 2: Zoom in and target the exact area
Open the image, zoom into the relevant region, and move the target over a consistent patch of color. A precise tap matters because neighboring pixels can represent different details.
Consider a blue button in a screenshot. The center may be #2563EB, while an antialiased edge may contain lighter values blended with the background. Selecting the middle of the button provides the value that most closely represents its intended fill.
For textured objects such as fabric, wood, plants, or stone, inspect several points. These materials naturally contain highlights, shadows, and small variations. You can choose a representative middle value or keep several samples as a small material palette.
Step 3: Read the color name and values
After selecting a point, review the available formats:
- Color name gives you a readable description such as sky blue, coral, or slate.
- HEX provides a compact six-digit value commonly used in websites and design tools.
- RGB shows the red, green, and blue channels on a 0 to 255 scale.
- HSL describes hue, saturation, and lightness.
- CMYK provides a print-oriented approximation.
For example, the ColorSnap cyan accent can be represented as:
| Format | Value |
|---|---|
| HEX | #38BDF8 |
| RGB | RGB(56, 189, 248) |
| HSL | HSL(199, 95%, 60%) |
| CMYK | CMYK(77%, 24%, 0%, 3%) |
These are different ways to describe approximately the same screen color. The best format depends on what you plan to do next.
When you need an RGB color finder for image work, use the RGB result to inspect the red, green, and blue channel values directly. Keep the HEX value alongside it when the same color will move into CSS or a design handoff.
Step 4: Copy, save, or share the result
Copy the HEX value when you need a quick code for CSS, Figma, a design token, or a project note. Save important colors to history or favorites when you are inspecting multiple areas or comparing several photos.
A developer might turn a sampled color into a CSS variable:
:root {
  --reference-blue: #38BDF8;
}
A designer might save the same color alongside a dark background and a supporting accent. The individual value then becomes part of a reusable visual system rather than an isolated sample.
Explore the broader ColorSnap feature set to see how copying, favorites, history, contrast checking, and palette extraction fit into this workflow.
Example: finding a color in a UI screenshot
Suppose you receive a screenshot of an app but do not have its design file. Open the screenshot in the photo color picker, zoom into the component, and tap the center of the fill.
Sample the background, text, border, and action color separately. Label each result immediately so the values do not become confusing later. Then test the reconstructed colors in your interface rather than assuming one sampled pixel represents every state.
Screenshots may be scaled or compressed by messaging apps. If possible, ask for the original image or an exported design asset before making final implementation decisions.
Example: identifying a color from a real object
Imagine that you want to capture the green from a plant leaf. Take the photo in indirect daylight, avoid a glossy highlight, and sample a broad central area. You may find values ranging from #3F7D44 in the lighter region to #285A32 in the shadow.
Neither value is automatically wrong. The leaf contains both colors. Choose the sample that matches the role you need, or use both as a light and dark pair.
How accurate are photo color results?
The app can identify the stored pixel accurately, but the pixel may not perfectly represent the original object. Camera white balance, exposure, sensor processing, image compression, screen calibration, and ambient light all affect appearance.
Photo-based results are well suited to interface references, digital art, mood boards, inspiration, and approximate material matching. Color-critical manufacturing, paint production, and professional printing require calibrated equipment, controlled lighting, and physical samples.
Gallery picking or camera identification?
Use a gallery image when you need to inspect an existing digital asset. It avoids introducing another camera capture and is usually the most direct option for screenshots and design references.
Use the camera when the color exists in the physical world. The camera color identifier guide explains how distance, light, and reflections affect that process.
In both cases, select several nearby pixels and consider the context. A useful color decision combines the numeric result with visual judgment.
Explore ColorSnap color tools
Start from the ColorSnap homepage or review the complete app features. For focused workflows, learn about the Android color identifier, use the photo color picker, or explore the image palette generator. The ColorSnap FAQ answers common questions about formats, images, saved colors, and app usage.
Frequently Asked Questions
Can Android identify a color from any photo?
An Android color picker can inspect standard gallery or camera images. Results are most useful when the target area is visible, well lit, and large enough to select precisely.
Which color format should I copy?
Use HEX for most web and design handoffs, RGB for channel-based work, HSL for adjusting related colors, and CMYK as an initial print reference.
Why does the color change when I tap nearby?
Photos contain pixel-level variation from texture, lighting, edges, and compression. Compare a few points and choose the value that best represents the area.
Are color names exact?
Color names are friendly labels matched to a nearby known shade. The numeric code is the better reference when you need an exact digital value.
Can I make a palette from the same photo?
Yes. Use an image color palette generator to extract several useful colors and then refine their roles for your project.