
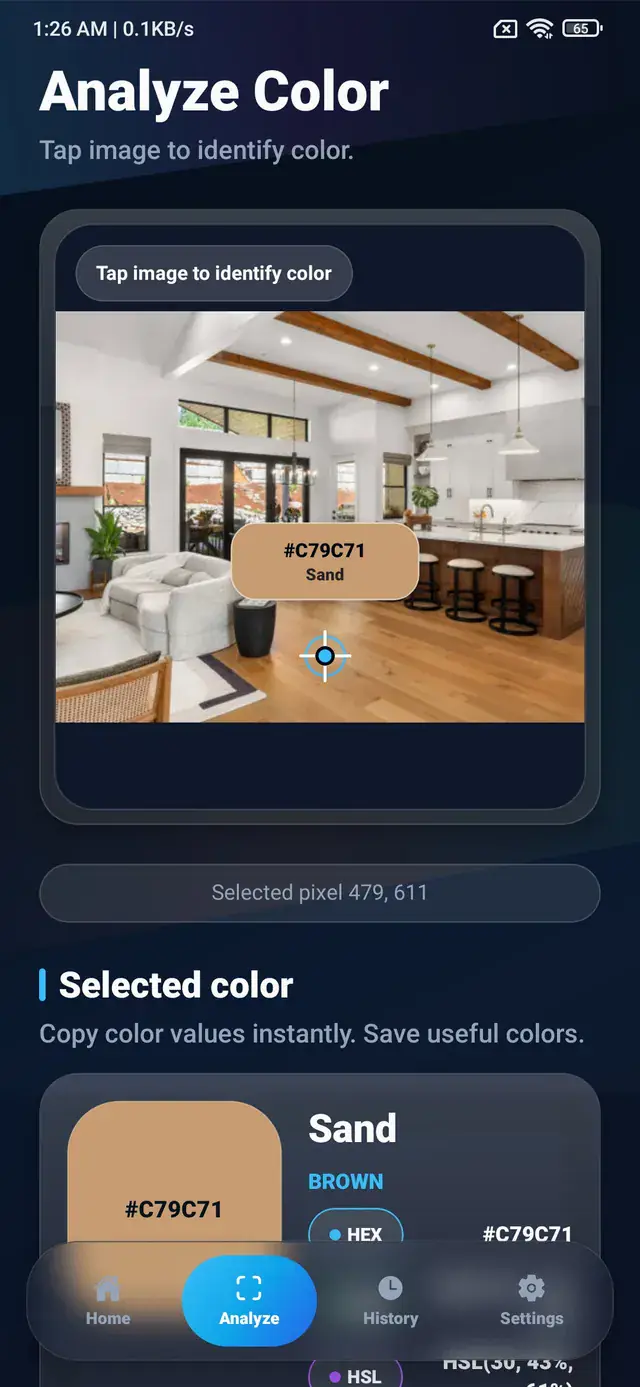
Quick answer: A camera color identifier captures an image, reads the pixel at a selected point, and converts it into a color name and values such as HEX, RGB, HSL, or CMYK. It is useful for inspiration and approximate references, but lighting and camera processing affect the result.
How camera color identification works
A phone camera records light through a sensor. The camera system processes that data using exposure, white balance, noise reduction, sharpening, and other adjustments, then stores a digital image.
A color identifier does not directly read the physical object’s pigment. It reads the processed pixel in that image. When you tap a point, the app retrieves its red, green, and blue channel values and converts them into additional formats.
For example, a selected pixel might produce:
HEX: #3F7D44
RGB: 63, 125, 68
HSL: 125, 33%, 37%
Nearest name: Forest Green
This is a precise description of the image pixel and an approximate description of the photographed object.
When a camera identifier is useful
Camera-based picking is practical when the source color is not already available as a digital file. Common examples include:
- collecting inspiration from architecture;
- recording the colors of plants and landscapes;
- inspecting packaging and printed material;
- comparing clothing or fabric tones;
- building a palette from a room;
- capturing colors from artwork or craft materials;
- documenting product and interior references.
The result can guide an app mockup, illustration, mood board, presentation, or design exploration.
For an existing screenshot or saved photo, use a gallery color picker instead. That avoids adding another camera capture step.
Why lighting changes the result
Objects do not have one fixed appearance under every light. A neutral wall can look warm under an incandescent lamp, cool under cloudy daylight, and green near a colored sign.
The camera records the light reaching its sensor. If the light source has a strong color, that influence becomes part of the pixel.
For a more representative capture:
- use indirect daylight or a neutral light source;
- avoid mixing window light with strongly colored indoor light;
- keep the object away from colored reflections;
- avoid deep shadow;
- capture more than one image for comparison.
If the creative goal is to capture the mood of the scene, keep the lighting influence. If the goal is to approximate the material’s base color, control it.
White balance and automatic processing
Phone cameras try to make scenes look natural. Automatic white balance estimates which areas should appear neutral and shifts the image accordingly.
Two camera apps can process the same scene differently. Even two captures from the same phone may change when the framing includes more sky, skin, or artificial light.
HDR can also combine multiple exposures, altering shadows and highlights. Scene enhancement may increase saturation or contrast. These features can improve photographs while moving pixel values away from a controlled measurement.
Use the same camera setup and similar framing when comparing objects.
Step 1: Prepare the object and scene
Place the object under even light. Remove nearby colored items that may reflect onto glossy surfaces. Clean reflective packaging or screens when glare obscures the color.
For a flat sample, place a neutral gray or white reference nearby. This does not calibrate the phone automatically, but it helps you notice whether the image has an obvious color cast.
Avoid using digital zoom. Move closer while keeping the camera able to focus. More source detail makes it easier to select a stable area.
Step 2: Capture a steady, focused photo
Hold the phone parallel to flat surfaces when possible. Tap to focus on the object, wait for exposure to settle, and take more than one shot.
Do not place the target at the edge of the frame if the lens creates visible shading or distortion there. The central region often provides a more consistent capture.
ColorSnap lets you take a camera photo and then inspect the captured image through its color identifier workflow. Reviewing a still image is useful because you can zoom and compare nearby points.
Step 3: Select several pixels
A real object rarely has a perfectly uniform surface. Fabric has fibers, paint has texture, wood has grain, and leaves have veins and highlights.
Tap a broad, evenly lit region first. Then sample two or three nearby locations. If the values are close, select a central representative result. If they vary widely, keep several colors or improve the lighting and capture again.
Avoid edges because they may blend the object with its background. Avoid highlights unless the highlight itself is the desired color.
Step 4: Interpret the formats
Use the output according to the next task:
- copy HEX for a digital design token;
- use RGB for channel-based work;
- use HSL to explore related lightness or saturation;
- treat CMYK as an initial print-oriented conversion;
- keep the color name as a readable label.
If a plant sample reads #3F7D44, you might create a darker companion and pale surface for an interface:
:root {
  --leaf: #3F7D44;
  --leaf-dark: #285A32;
  --leaf-soft: #E3F1E4;
}
These companion values should be designed and tested; they are not necessarily present in the source object.
Camera results versus physical color measurement
A camera color identifier is not a spectrophotometer or calibrated colorimeter. Professional instruments measure color under defined conditions and support controlled production workflows.
Use phone-based identification for:
- inspiration;
- approximate matching;
- digital references;
- documenting scene appearance;
- early palette exploration.
Use calibrated equipment and physical samples for:
- manufacturing specifications;
- exact paint formulation;
- textile production;
- professional print matching;
- medical or scientific decisions involving color.
Being clear about the purpose makes the camera workflow more useful, not less.
Example: capturing a wall color
Photograph the wall in indirect daylight, with the camera facing it directly. Avoid the bright area next to a window and the deep shadow near furniture.
Sample several central points. If they range around warm gray values such as #B8B0A4, record the result as an approximate visual reference and note the time of day.
Do not expect a paint store to reproduce the wall exactly from the phone code. Existing paint may have aged, and the camera image includes light and sensor processing.
Example: building a nature-inspired palette
Capture a scene containing leaves, bark, sky, and stone. Instead of treating the whole image as one color, generate a palette and inspect individual areas:
- leaf
#3F7D44; - bark
#6B4F3A; - sky
#7DD3FC; - stone
#94A3B8; - shadow
#1F2937.
Refine these values into project roles using the guide on creating a color palette from an image.
Privacy and permissions
A camera feature needs permission to take a photo. Gallery selection may use the platform’s media picker to provide a chosen image.
ColorSnap processes selected images on the device for its color tools. The privacy policy explains the app’s image handling and permissions in more detail.
Users should grant only the access needed for the task and review Android’s permission controls when circumstances change.
Explore ColorSnap color tools
Start from the ColorSnap homepage or review the complete app features. For focused workflows, learn about the Android color identifier, use the photo color picker, or explore the image palette generator. The ColorSnap FAQ answers common questions about formats, images, saved colors, and app usage.
Frequently Asked Questions
Can a phone camera identify an exact paint color?
It can provide an approximate image-based color. Exact paint matching requires controlled light, physical samples, and appropriate measurement equipment.
Why do two photos of the same object produce different codes?
Exposure, white balance, focus, angle, reflections, and ambient light can change between captures.
Should I use live camera color detection or a captured photo?
A captured image is easier to zoom, compare, and revisit. Live detection can be quick, but a still frame supports more deliberate selection.
Does distance affect the color result?
Distance can affect focus, exposure, and the number of pixels covering the target. Move close enough for detail while keeping the image sharp.
Can I extract a palette from a camera image?
Yes. Capture the scene, then use the palette generator to identify several representative colors.